Wed Apr 1, 2026 | Updated 06:12 PM IST HZ Awards 2026

Giving a new touch to your home through a renovation can uplift the mood and break the monotony. While decorating the whole house can turn out to be expensive and impractical during this unprecedented lockdown, tweaking a few old things to give it A new look using materials found at home can bring a huge difference. After all, a good looking house helps in keeping anxiety and stress at bay. And now that you have to spend almost all your time in there, why not to use each day to enhance the look of at least one item per day. Here is a day by day home improvement guide to transform your home.
Bored of looking at the same lampshades? Let’s give it a new touch with just strings that every household already has!
Supplies
Steps
Take a balloon. Blow air in it, to make the balloon as big as you want your lampshade to be.
Pour 2 small cups of clear glue into a bowl. Add one cup of water to dilute the solution.
Now, take the thread and swirl it around in the glue until it’s fully coated.
Closely wrap the dipped thread around the balloon, overlapping each other. You need not be neat. Let dry overnight.
The next morning burst the balloon and remove it from the lampshade. Place it over the bulb and the stand and you’re done.
Mini flower pots are placed almost on every table of the house. Use old cloth pins to embellish small pots in 5-minutes.
Supplies
Steps
Take a small flower pot of any shape. Start by cleaning the outer portion with a brush or cloth.
Using a spoon move mud from the sides in between to make space for decoration.
Now take the same or different colour cloth pins and start clipping them on the pot all around, not leaving any space in between.
We all have plastic bottles at home. While you can give away the bottle to recycle, use its cap to upgrade your old defective floor mats.
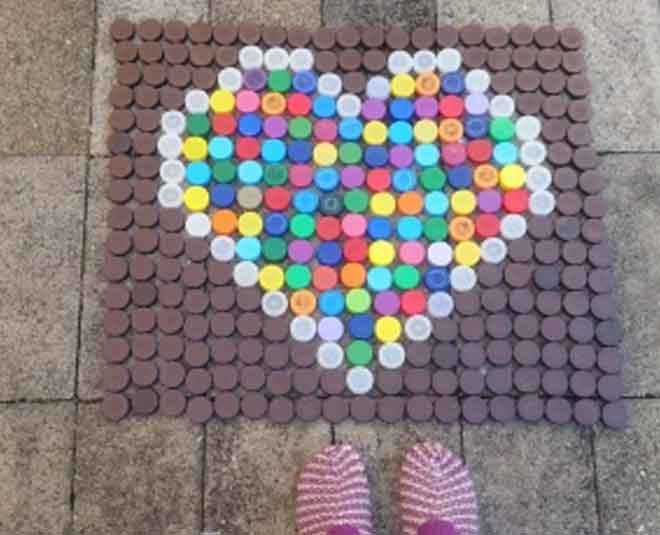
Image courtesy: freeinthesea2014
Supplies
Steps
Starting by removing rough edges from the surface of the mat using sandpaper. Once done clean it with brush or cloth.
Arrange bottle caps next to one another closely. Pick and paste after you are done organising.
Began in one direction so you don’t miss any. Let it dry for 2-3 hours.
Allow your vibrant nail polishes to enhance the beauty of your plane switchboards. Use polishes to make the stylish marbled design.
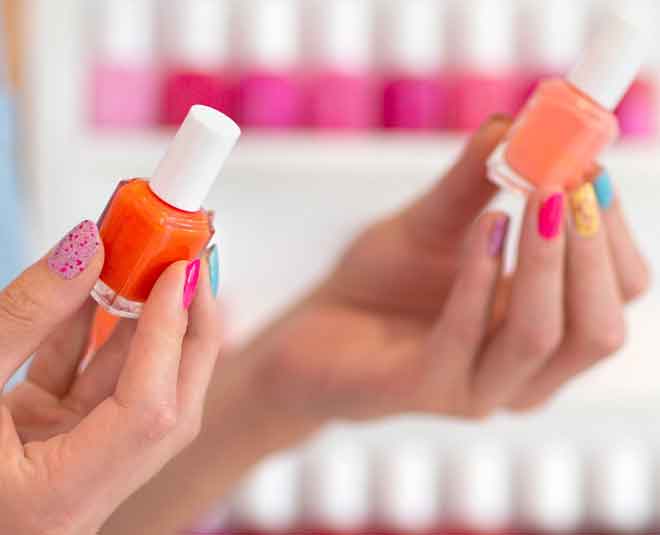
Image courtesy:hearstapps.com
Supplies
Steps
Using screwdriver open the upper layer or board and detach from switches and wires.
Take the bowl to fill it with water. Pick your first polish paint. Drip a few drops of the colour onto the surface of the water.
Mind carefully dropping from just about an inch or so above the surface of the water otherwise paint will settle in the bottom.
Once you drop the paint correctly, the nail polish will start to spread. Quickly drop the second and third colours in the same manner.
With the help of a toothpick or the handle tip of a small paintbrush carefully swirls the paint around. Try achieving a marble effect on the surface of the water.
Take your board cover and hold it by making it face down toward the water. Lightly touch it to the surface of the water. You will notice nail polish will start adhering to the cover.
Once the case is fully covered in the marbled polish, remove from the water and let it dry. Put the painted cover back.
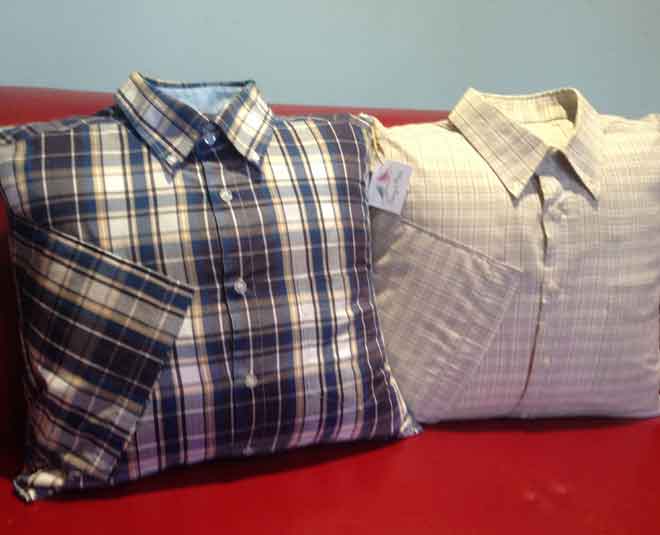
Don't let your cushion stay dull ann boring with that same old cover. Spice things up by making a brand new cover with simple old shirts.
Supplies
Steps
Using the cushion insert as a guide, cut out the fabric at the bottom of the shirt. Cut the arms off the shirt.
Sew the collar in place to the body of the shirt. Sewing the collar down will help prevent it from flapping open, or getting caught.
Sew the button area by closing the buttons of the shirt.
Fill it with your cushion insert. Push the cushion insert to the top of the shirt. Use this as a guide to mark at the bottom of the shirt where you will need to sew the bottom seam. Sew the bottom area.
Plaster of paris is an awesome item to redesign most of the objects at home. POP, that is found in every storeroom can be used to brighten up glass flower pot.
Supplies
Steps
Wear hand gloves. Take a bowl put plaster of paris, add half cup water. Mix well into thick paste.
Take the flower pot, using your hand dap pop solution around the pot, covering whole area. Leave the bottom portion.
Need not be need at all. Make whatever patterns you like. Let it dry for 3-4 hours.
Once done, paint it using one or different acrylic paint.

Image courtesy: alicdn.com
We use the same style clock for years. While some are gifted others are the one we don’t want to see anymore. Use a plate to enhance it.
Supplies
Steps
Mark the centre of the plate. Make a small hole using drilling machine.
Take the back portion of the clock kit. Stick it through the hole so that the metal portion is pushed all the way in.
Lock the front part, the one with hands on the front side of the plate and you’re done.
It is a great way to utilise naturally broken petals and leaves. Use its lovely texture to upgrade your dull coaster’s beauty. 
Image courtesy: i.ytimg.com
Supplies
Steps
Using a paintbrush colour the coaster. Let it dry.
Arrange the pressed dry flowers on the coaster.
Take the clear glue to start sticking the pieces one by one. Let it dry.
Once done, apply a thick layer of clear nail polish over the case. After 1 hour, apply the second layer.
Nameplates must look classy and chic. The one that are old and decoloured gives the dull impression of the people living in there. Deck it up using scrabble tiles.
Supplies
Steps
Clean the old nameplate using denatured alcohol.
Apply a thin coat of clear nail polish on the upper surface for the shine.
Arrange scrabble tiles as per the name you want to put on it. Place on the plate.
Pick and apply glue on each tile, place it back on the nameplate. Let it dry for 30 minutes.
Don't Miss: Elevate Your Style Game: Try These Ways To Drape Scarves & Stoles Differently
The luxurious velvet fabric can be found in the corners of your house. Look especially for an old velvet upholstery, as it can help creating a stunning phone case.
Supplies
Steps
To trace the dimensions of the phone on the piece of velvet cloth use old phone case. Do not forget perfectly tracing the camera space and other holes.
Cut out leaving 2 inches space to fold the fabric. After cutting the entire case, lay the fabric on a plane surface and cut out the holes using a paper cutter. Run the blade 2-3 times for flawless results.
Now, take the old case, clean it and apply a thin layer of rubber solution using a brush. Once done start by pasting the fabric from the *corners. Workaround the whole case.
Lastly, even the edges and place the cover under something heavy. Let it dry for around 2-3 hours.
Don’t we love how old cassettes look? Upgrade it and make a small wallet.
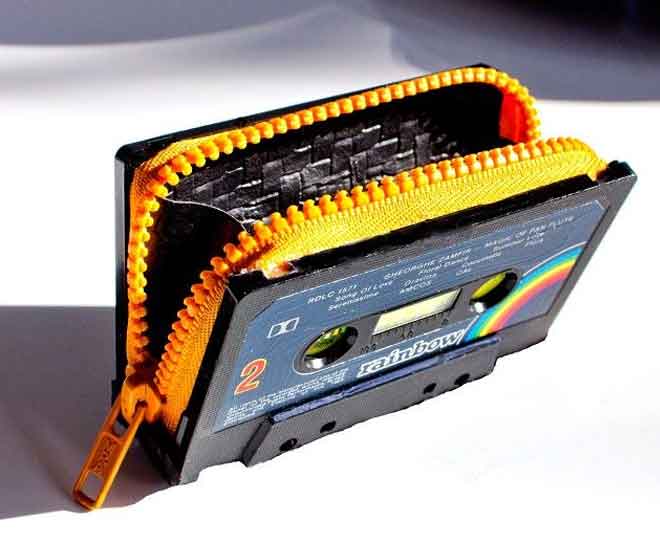
Image courtesy: pinterest.com
Supplies
Steps
Begin by opening the old cassette using a screwdriver. You will find reel inside. Remove it.
Trace the cassette on the fabric and cut it. Paste the cloth on the inside portion of the cassette.
Now take the zipper and start pasting them around the corners of the cassette to make a wallet. Let it all dry.
Every Indian have a few sarees she adore but doesn’t wear. Use that extremely vibrant and light saree to spruce up your old curtains.

Supplies
Steps
Measure the saree same as the length of your old curtain. Cut the saree fabric accordingly.
Place the saree piece over the curtain and start stitching with hands using matching thread.
Stitch upper and bottom part to keep both in place. You can also put small knots in between for better grip.
Once done, fold and iron the curtains and put back on the rod.
Don't Miss: #21DayChallenge: 21 Easy & Fun Braid Hairstyles So You Look Insta-Ready Everyday
We all have a few pair of jeans that we don’t wear any more. Make shorts from one half and matching slippers from the other.
Supplies
Steps
Take out the straps of the slipper. Now take the fabric place it over the slipper and trace. Don’t forget the holes.
Cut the fabric accordingly along with the holes. Paste it using rubber solution. Let it dry.
Now, cover the strap with the fabric following the same steps. Do not cover the endings.
Insert strap in the slipper and its done.
Big or small, old-age trunk sits in our store room for as long as we can remember. With the help of cosy pillows add extra sitting to your drawing room.
Supplies
Steps
You will need one large piece of fabric. Measure and cut the fabric for all the parts of the trunk on by one. Including the inner part of the trunk.
Using rubber solution start pasting all the parts one by one. Let it dry.
Take old clothes, stack it and place it inside to fill half of the trunk.
Now take the same fabric that you used as the cover and place it over the stacks as a cover.
Place the pillows over it and on the lid of the trunk.
Colourful ropes are delight to the eyeballs. We store them because we want to use them as a decorative item. Fix your old knobs using ropes.
Supplies
Steps
Using a screwdriver remove old knob. Pass a robe through the existing know hole.
Take 2 other rope tie with the first one. Braid twice and make a knot. Repeat the same procedure on the knobs.
Photo frames add extra persona; touch your house. Enhance its beauty by using broken china in no time.

Image courtesy: pinterest
Supplies
Steps
Start by cleaning the surface of the frame. Now, start by closely sticking each broken piece on the sides of the frame with the help of adhesive.
Try not to leave much space in between for better appearance.
Fill the walls of the frame by repeating the same process. Once done, let it dry for a day. At last clean the glue on the upper surface with the soap solution.
Correct lighting is the key to flawless makeup. Lighten up your makeup mirror using LED lights.
Supplies
Steps
Measure the length of the LED strip before using it. It should cover the sides of the mirror completely.
Start pasting the light on the sides carefully using a rubber solution.
Once done, paste the LED strip’s wire close to the light. Leave 3-4 inches so that the wire may reach the middle part of the mirror’s back attached to the battery.
Stick three batteries together and paste on the back.
Upgrade the look of your fruit basket using broken martini glass. After all everything on your dining table must look chic.
Supplies
Steps
Start rubbing the edges of the martini using sandpaper. Remove all the sharp edges to make it flat enough to be pasted.
Now, take the fruit basket and attach martini to the bottom using rubber solution.
Once done, let it dry for an hour. Now apply another outer coat of rubber solution from where you attached the martini and the basket. Let it dry.
Every Indian household has a few tapestry that they don’t use. Why waste them by keeping in storage, instead embellish your jewellery box using it.
Supplies
Steps
First, trace the lid of the jewellery box on a paper and then on the tapestry to avoid mistakes.
Horizontally or vertically lay out the fabric.
Cut your fabric 2 inches small to the size of your jewellery box lid. You just want to add the tapestry as a design on top and not cover it.
Embroider all around the edges with a simple chain stitch. Chose contrasting threads for better appearance.
Using rubber solution paste the tapestry onto the jewellery box lid and press down.
Especially mind the edges are pasted well. Cut off excess thread around.
Now that you are likely to use soap dispensers more, why not decorate it with jute ropes!
Supplies
Steps
Make sure the dispenser is dry. Apply a thin layer of hot glue on the dispenser. Using a brush spread it well all around.
Take the rope, start wrapping around the dispenser. While you do so, keep applying hot glue on every layer.
Do not overlap any layer. Once done, let it dry overnight.
We all have beautiful pearl necklaces that we don’t wear anymore. Using them to style the pen stand or makeup brush stand.
Supplies
Step
Start by mixing small and big size pearls together. Now paint your pen stand or makeup brush stand in white, using a flat paintbrush.
After evenly applying the paint, let it dry for 5-minutes.
Now, place the pearls around the stand. Once you are satisfied with the positioning, pick each, apply rubber solution and place it back.
Start pasting from one direction, so that you don’t get lost in between.
Once done, leave it overnight to dry.
All these DIYs are extremely simple and fun to make. The supplies are also easy to find, as most of them are already available at home. Try indulging your kids and family, as it can turn out to be a fun day activity. Also, by the end of three weeks of pure craft and bliss, you will be a hands-on artist with making some head-turning items at your place, right in time to invite a few friends over perhaps!
Also watch this video
Herzindagi video
Our aim is to provide accurate, safe and expert verified information through our articles and social media handles. The remedies, advice and tips mentioned here are for general information only. Please consult your expert before trying any kind of health, beauty, life hacks or astrology related tips. For any feedback or complaint, contact us at [email protected].