Wed Apr 1, 2026 | Updated 05:33 PM IST HZ Awards 2026
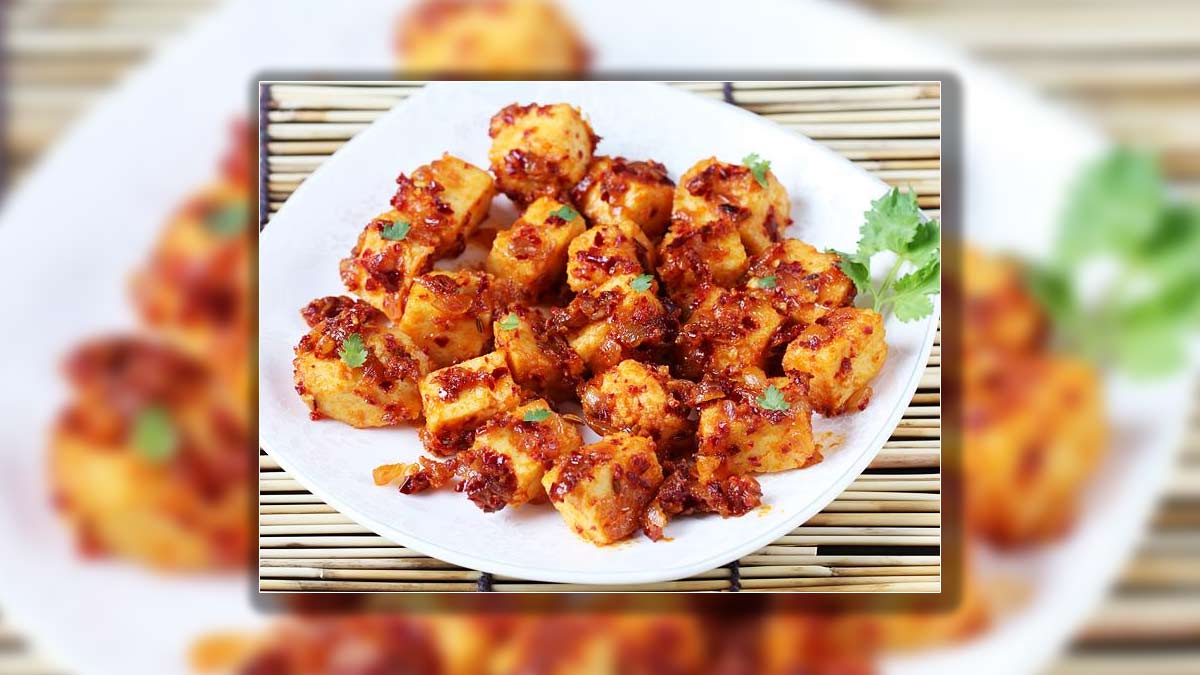
Paneer, a versatile ingredient in Indian cuisine, lends itself beautifully to various flavours and cooking methods. One such tasty dish is garlic paneer, where the subtle sweetness of paneer combines with the pungent aroma of garlic to create a dish that's both comforting and delicious. This easy garlic paneer recipe is by Chef Swasthi Shreekanth.
Garlic paneer makes for a wholesome and delicious meal that can be enjoyed with family and friends. Its rich, savoury taste and the creamy texture of paneer make it an irresistible treat. You can serve this as a side dish or a main course. Here’s a simple recipe to make garlic paneer at home:

1. Begin by cutting the paneer into bite-sized cubes. If you find the paneer too firm, you can soak it in warm water for about 10 minutes to soften it. Drain the paneer and set it aside.
2. In a blender, add the red Kashmiri chilies (soaked in warm water for 15 minutes to soften), finely chopped garlic, vinegar, and sugar. Blend until you get a smooth paste.
3. Heat 2-3 tablespoons of oil in a non-stick pan over medium heat. Once the oil is hot, add the paneer cubes. Fry the paneer until all sides are golden brown, turning occasionally to ensure even cooking. Remove the paneer from the pan and place it on some tissue paper to drain any excess oil.
4. In the same pan, add the cumin seeds and let them splutter. This should take about 30 seconds. Next, add the finely chopped onions. Saute the onions for about 4-5 minutes.
5. Add the garlic paste to the pan and cook for 2-3 minutes, stirring continuously to ensure it doesn’t stick to the bottom and burn. The paste should turn a deeper red colour.
6. Add the fried paneer cubes back into the pan. Stir well to coat the paneer evenly with the garlic paste. Add the soy sauce and salt to taste. Mix everything thoroughly. Let it cook for another 2-3 minutes.
7. Once everything is well combined, sprinkle the chopped coriander leaves over the top and serve it hot.
For more such stories, stay tuned to HerZindagi.
Image credit: Swasthi's Recipes
Also watch this video
Herzindagi video
Impress your family with this easy Garlic Paneer recipe
Cut the paneer into bite-sized cubes. Soak it in warm water for about 10 minutes to soften it. Drain the paneer and set it aside.
Now in a blender, add the red Kashmiri chilies, finely chopped garlic, vinegar, and sugar. Blend until you get a smooth paste.
Heat some oil in a pan and fry the paneer until all sides are golden brown.
Now in the same pan, add the cumin seeds and let them splutter. Add finely chopped onions and let it cook for 3-5 minutes.
Add the garlic paste to the pan and cook for 2-3 minutes until it turns a reddish colour.
Add the fried paneer cubes to the pan, stirring well to coat them evenly with the garlic paste. Add soy sauce, salt and let it cook for another 2-3 minutes.
Once everything is well combined, sprinkle the chopped coriander leaves over the top and it is ready to serve.
Our aim is to provide accurate, safe and expert verified information through our articles and social media handles. The remedies, advice and tips mentioned here are for general information only. Please consult your expert before trying any kind of health, beauty, life hacks or astrology related tips. For any feedback or complaint, contact us at [email protected].